How To Series - Repair Work for Beginners
|
[
Safety
|
Basics
|
Transformers
|
Speakers
|
Coils IF & RF
|
Capacitors
|
Resistors
& Pots |
Valves
]
This series is reprinted by kind permission of Peter Lankshear,
Invercargill, New Zealand.
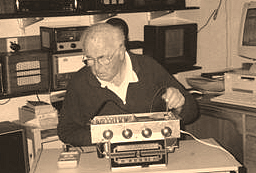
REPAIR WORK FOP BEGINNERS Part 1
 It is a sobering thought that anyone who, as a salesperson, sold new
valve radios, if not already retired, is close to it. Similarly, few
technicians who have repaired valve radios professionally are not in the
ranks of senior citizens. Servicing organizations in our throwaway
society are rare, as it is cheaper to buy a new appliance than pay a
technician to fix it. Even if we could afford it, to get our valve
radios repaired professionally is practically impossible ľ we are on our
own.
It is a sobering thought that anyone who, as a salesperson, sold new
valve radios, if not already retired, is close to it. Similarly, few
technicians who have repaired valve radios professionally are not in the
ranks of senior citizens. Servicing organizations in our throwaway
society are rare, as it is cheaper to buy a new appliance than pay a
technician to fix it. Even if we could afford it, to get our valve
radios repaired professionally is practically impossible ľ we are on our
own.
There are distinct differences between restoration, servicing and
overhauling of radio receivers, and we will therefore consider each
procedure separately.
True restoration is exacting work entailing bringing a radio back as
far, as is possible, to its original state. With very old equipment,
particularly that built prior to the mid 1930s, this can mean locating
or fabricating certain specialized components, and entails complete
dismantling and skilled refurbishing. Unfortunately much so-called
'restoration' work devalues the equipment. Only experienced technicians,
I believe, should undertake such work. Far better just to clean the
artifact and leave it as is than to botch it up.
Those who have never had to make a living doing repair work often
misunderstand servicing. Occasionally the writer hears criticism of work
a serviceman has done, or has not done, but it must be remembered that
his job was to attend to a specific complaint -no more and no less. A
garage mechanic who re-rings an oil burning motor when the owner asked
only for a tune-up will soon be out of business. So it was for the radio
serviceman. Certainly he could recommend that extra work should be done,
but without a very convincing case it would be vetoed. ôAspirin curesö
as an expedient were often made, not that the repair man did not know
better, but because it was the least costly solution ôExpense no objectö
is a relatively new phenomenon connected with the changed status of old
radios.
Overhauling, which particularly applies to radios dating from the
standardized mass production era of the mid 1930s and later, entails
checking and replacement of faulty components, often with modern ones
which may not necessarily be physically identical to the originals.
Generally these are out of sight under the chassis. Depending on the
skills and perfectionist attitude of the owner, they may be adapted or
disguised to look original.
In this series of articles the writer will describe his own system of
overhauling. Other systems are just as valid, but all must be
methodical. Overhauling can be divided into seven segments, which are: -
l) Mains and audio frequency transformers, chokes and loudspeakers.
2) RF and IF transformers and coils
3) Capacitors
4) Resistors
5) Valves
6) Hardware and wiring
7) Cabinets
Let us assume that you have arrived home with your latest 'find'.
After removing the worst of the dust, grime and mouse nests you plug it
in to see if it goes. STOP! THINK!, What will this achieve? At best you
will confirm that the set is going; more likely you will find that it is
faulty and as well, you could well cause some damage to the receiver,
and possibly to yourself if the wiring is faulty. Remember that it is
likely that you now have the set because it was sick. Your first step
should be to assemble a tool kit if you do not already possess one. This
can be quite basic, the essentials are:
A set of screwdrivers, long-nosed and side-cutting pliers, a small
Crescent type spanner, soldering iron of medium wattage, a set of socket
spanners or nut drivers and a drill with bits.
Absolutely essential is a test meter. Look for models, which will read,
measure both AC and DC voltages up to 500 volts or more. Resistance
scale readings should be up at least 50 megohms on the highest range.
Such a meter is likely to incorporate all the DC current ranges needed
for general service work. A range of AC currents is not essential for
ordinary service work, and in any case is likely to be found on only the
more expensive instruments. At one time, the only meters suitable for
serious work were expensive moving coil types. Today very reasonable
digital meters are readily available and quite satisfactory.
Before starting work obtain a copy of the relevant service data, if at
all possible. The Society has access to a wide range of such
information, which is invaluable for fault finding, checking voltages,
parts location and locating unofficial modifications.
Having cleaned out any rubbish, the first step is to remove the chassis.
Have a container for screws, knobs or other bits and pieces so that they
won't be lost. Also take plenty of notes of any plugs, connections etc
so that you will know how to put things back correctly. First remove the
knobs, which may be either push-on types or have grub screws. Some
Philips receivers have screws that go right through the shafts.
Sometimes knobs are frozen on to the shafts. Donĺt lever them off, but
insert a piece of strong cord behind the knob to give a straight pull.
If you are lucky the chassis will have only a couple of large screws or
bolts holding it down. Often dial mechanisms are fastened to the
cabinet. Before dismantling note carefully the locations of pulleys,
cursors etc. The service data may be of help here. It may also be
necessary to remove the speaker or unfasten the speaker leads if no
plug-socket is fitted.
REPAIR WORK FOP BEGINNERS Part 2
Now the wiring should be checked for condition and modifications. The
careful restorer is unlikely to make mistakes, but always be alert for
previous alterations. These are unfortunately all too common. Genuine
mistakes do occur, but it may well be that modifications have been made
previously in an attempt to "fix" the receiver, while other experiments
may have been directed at "improving" the set. Regardless of the reason,
always be on the lookout for foreign work, particularly if non-original
looking wire and components are in evidence. Develop a suspicious
approach.
Insulation condition is important. Materials like PVC, commonly found in
Post War receivers should be satisfactory, but it can be brittle and is
liable to melt if heated. Fabric covered wiring is normally no problem,
but rubber insulation, particularly in Philips and Mullard and Atwater
Kent receivers, can be a disaster. In many cases, the only remedy is
complete rewiring. Do this systematically, one lead at a time and try to
maintain the original length and positioning. Look carefully at mains
leads. Fabric coverings often conceal perished rubber covered wires that
can be downright dangerous.
Early in the series I stressed the importance of obtaining as much data
as possible. Study the diagrams and check as carefully as you can that
there are no mistakes. Experienced collectors often have horror stories
of lethal connections to mains plugs.
BEFORE GOING ANY FURTHER. MAKE SURE THAT THE MAINS PLUG IS SOUND, AND
ABOVE ALL THAT THE CONNECTIONS AND COLOUR CODING ARE CORRECT.
Just to be sure, check with an ohmmeter that there is no connection
between the live mains connections and chassis. Now for the big moment!
Fit a set of valves but leave the rectifier out of its socket. Switch on
and note that the valves and pilot lamps light up. If all seems well
after a minute or two, switch off and plug the rectifier in. Connect a
meter switched to the 500 or 1000 volt range across the HT line and
switch the receiver on. After a half minute, the voltage reading should
be within about 10% of that shown in the service data. Naturally, be
alert for any signs of distress. In the absence of correct figures,
somewhere between 200v and 300v would be expected in most middle sized
sets.
Assuming that the H.T. is correct, check out other key voltages. Again,
the official figures should be used if at all possible. Failing that,
the screens of the R.F. and I.F. sections should read about 100 volts.
The anode of the first audio stage is likely to have about half the H.T.
voltage on it. Anything less than 50 volts or more than 200 volts should
be investigated.
Finally, bias voltages should be checked. R.F. and I.F. stages generally
have 2 or 3 volts bias which can be measured at the cathodes if cathode
resistors are used. Many receivers used the voltage drop across a
resistor, often tapped, and connected to the negative end of the power
supply. With this system, the R.F. and I.F. bias voltage was fed to the
bottom end of the A.G.C. line. In these receivers, unless you are using
a digital meter, always measure the voltages across the bias resistors
-not at the grids. The reason for this is that moving coil meters draw
current, creating errors from the voltage drop in the grid resistors. In
earlier receivers without A.G.C. a common method of volume control was
by varying the cathode bias on the R.F. and I.F. stages. In these cases,
measure the bias voltage with the volume control fully advanced.
The bias for output valves varies from set to set. For valves of the
42/6F6 class, 16 to 18 volts can be expected. 6V6/6AQS types have 12-14
volts whilst PENA4, KT61, EL33, EL41 and EL84 valves run at around 6-8
volts bias. Small receivers often used extra bias to limit current
drain. .
In all cases, if at all possible use the service data to check voltages.
The examples given are a guide only. Assuming that voltages are correct.
the receiver should be showing signs of life. If the alignment has not
been tampered with it should be going properly. but all too often the
alignment will be wrong. If ever there was a case of the inexperienced
rushing in where the expert would proceed warily, it is in the question
of realignment. Many serviceman can relate stories of finding every
trimmer screwed up tight because someone had tried to ôfix the set" by
tightening the loose screws. Again, it is common practice for those with
a bit of knowledge to attempt realignment to overcome a lack of
sensitivity, when the real problem is faulty components. If the
suggestions given in this series have been followed, these components
should have been found.
REMEMBER THAT REALIGNMENT SHOULD ONLY BE ATTEMPTED WHEN ALL ELSE HAS
BEEN CORRECTED. It cannot remedy faults!. A reliable signal generator
should be available before alignment is attempted. Certainly, broadcast
stations can be used as markers, but the first essential is to get the
I.F. transformers correctly tuned, and about the only practical way to
do this is to use an accurate generator. For critical alignment,
metering of the receiver output is necessary and for this, a tone
modulated signal, available from an oscillator is needed.
With most I.F. systems, the object is to bring each tuned circuit .to
the operating frequency by peaking the adjustments in succession. It is
important that the frequency be correct. or dial readings will not be
right and sensitivity will be poor. Some large receivers used over
coupled I.F. transformers to improve fidelity. A standard I.F.
transformer has two windings. each tuned to the operating frequency,
spaced at what is known as critical coupling. If the spacing is greater
than this, the gain of the amplifier is reduced. An interesting
situation arises if the spacing is closer than critical. Although each
winding is tuned to the operating frequency, the overall response has a
humped response with a peak either side of centre. This broadens the
response to reduce sideband cutting, but makes normal adjusting
techniques impossible. The manufacturer's instructions must be followed
carefully in these sets.
Superheterodyne receiver local oscillators operate at a frequency
precisely equal to that of the I.F. amplifier plus the signal frequency.
In run of the mill broadcast receivers, tracking to achieve this is
reasonably straightforward. but, multiband receivers, especially those
with bandspread, must be aligned according to the makerĺs instructions.
Some, for example Zenith and Wells Gardner chassis, must be adjusted in
an exact sequence.
Obviously, in an article like this. It is quite impossible to give
adequate instructions covering the range of receivers likely to be
encountered. The only practical approach is to obtain the manufacturers.
data that can often be obtained from
NZVRS sources.
I hope that this series has been of some help to beginners, but I must
emphasize that all the articles in the world will not make an expert.
Only practice, research and experience will do that.
 |
|
 Main
Menu[
Home |
ęredits
|
Search
| Promote
|
Links
|
Guest
Book |
What's New?
]
Main
Menu[
Home |
ęredits
|
Search
| Promote
|
Links
|
Guest
Book |
What's New?
]